
May 4, 2026
Should You Clean Cards Before Grading? A Guide
Wondering should you clean cards before grading? Learn safe cleaning tips, what to avoid, and how to prep your cards for the best possible grade.
You’ve pulled a monster card. The centering looks perfect, the corners are sharp, and you’re already thinking about the grade it could get. But when you hold it under the light, you see it: a tiny fingerprint or a bit of dust from the pack. This is the moment every collector faces, the one that leads to the big question: should you clean cards before grading? The internet is full of conflicting advice, with some people swearing by risky methods and others saying to never touch the card at all. This guide cuts through the noise to give you a safe, straightforward process for prepping your cards for submission.
Key Takeaways
- Clean, don't alter your cards: Your goal is to remove surface-level dust and fingerprints with a microfiber cloth. Attempting to fix scratches, creases, or faded color is considered altering and will result in a rejected grade.
- Use the right tools for the job: A soft microfiber cloth is your best friend for gently removing smudges. Never use liquids, household cleaners, or abrasive materials like paper towels, as they can permanently damage the card's finish and stock.
- Protect your card immediately after cleaning: Once you're done, slide the card into a fresh penny sleeve and a semi-rigid holder. Always handle it by the edges to avoid new smudges and pack it securely to ensure it arrives safely for grading.
Should You Clean Cards Before Grading?
So, you’ve pulled a card that could be a real gem, and you’re thinking about getting it graded. The big question on every collector’s mind is whether to clean it first. The short answer is yes, a gentle cleaning can make a difference, but it’s not as simple as just wiping it down. Done incorrectly, you can do more harm than good. Let’s walk through what you need to know to make the right call and prepare your card for its big moment.
How Condition Impacts Your Card's Grade
When you send a card for grading, you’re asking experts to scrutinize its physical condition down to the tiniest detail. The final grade is a reflection of how well the card has been preserved. Even seemingly minor issues can have a major impact on its final grading score. Things like fingerprints, light dust, or almost invisible surface smudges can be the difference between a good grade and a great one. Graders look at four main criteria: centering, corners, edges, and surface. A clean, flawless surface is a huge part of that equation, which is why prepping your card is a step you don’t want to skip.
Cleaning vs. Altering: Know the Difference
This is the most important rule to remember: cleaning is not the same as altering. Think of cleaning as simply removing things that are on the card, not part of it. This includes dust, fingerprints, or light residue. It’s about presenting the card in its original, true state. Altering, on the other hand, is trying to fix or conceal damage. This includes things like buffing out scratches, polishing the surface, or trying to re-color faded edges. Grading companies consider any form of card alteration a major foul, and it will get your card rejected or labeled as "Altered."
When Cleaning Helps (and When It Hurts)
A careful, proper cleaning can absolutely help your card’s grade. By removing surface dust and fingerprints, you’re eliminating small flaws that a grader might otherwise penalize. This gives your card the best possible chance to shine and achieve the grade it deserves. However, the risk comes from improper technique. Using the wrong materials, too much pressure, or any kind of liquid can easily damage the card, creating new scratches or weakening the card stock. An improper cleaning attempt can lead to a lower grade or even get your card disqualified for being altered. The key is to be gentle and know when to stop.
Common Myths About Cleaning and Grades
Let’s clear up a couple of common misconceptions. First, grading companies do not clean your cards for you. They expect you to submit your cards in their best possible condition. It’s your job to handle the prep work before it ever leaves your hands. Second, some collectors believe that if a card needs cleaning, it’s probably not a high-grade contender anyway. That’s not always true. Even a card fresh from a pack can have factory dust or a fingerprint from handling. A quick, safe wipe-down is often a standard part of the pre-grading process for even the most pristine cards.
How to Safely Clean Your Trading Cards
Once you’ve decided a card could benefit from a light cleaning, the key is to proceed with caution. The goal here is to gently remove surface-level dust, fingerprints, or minor smudges without altering the card in any way. Think of it as a careful dusting, not a deep scrub. Using the right tools and techniques is essential to avoid causing scratches, softening corners, or creating moisture damage, all of which could lower the card’s potential grade. Let’s walk through the safest way to get your cards looking their best before you send them off.
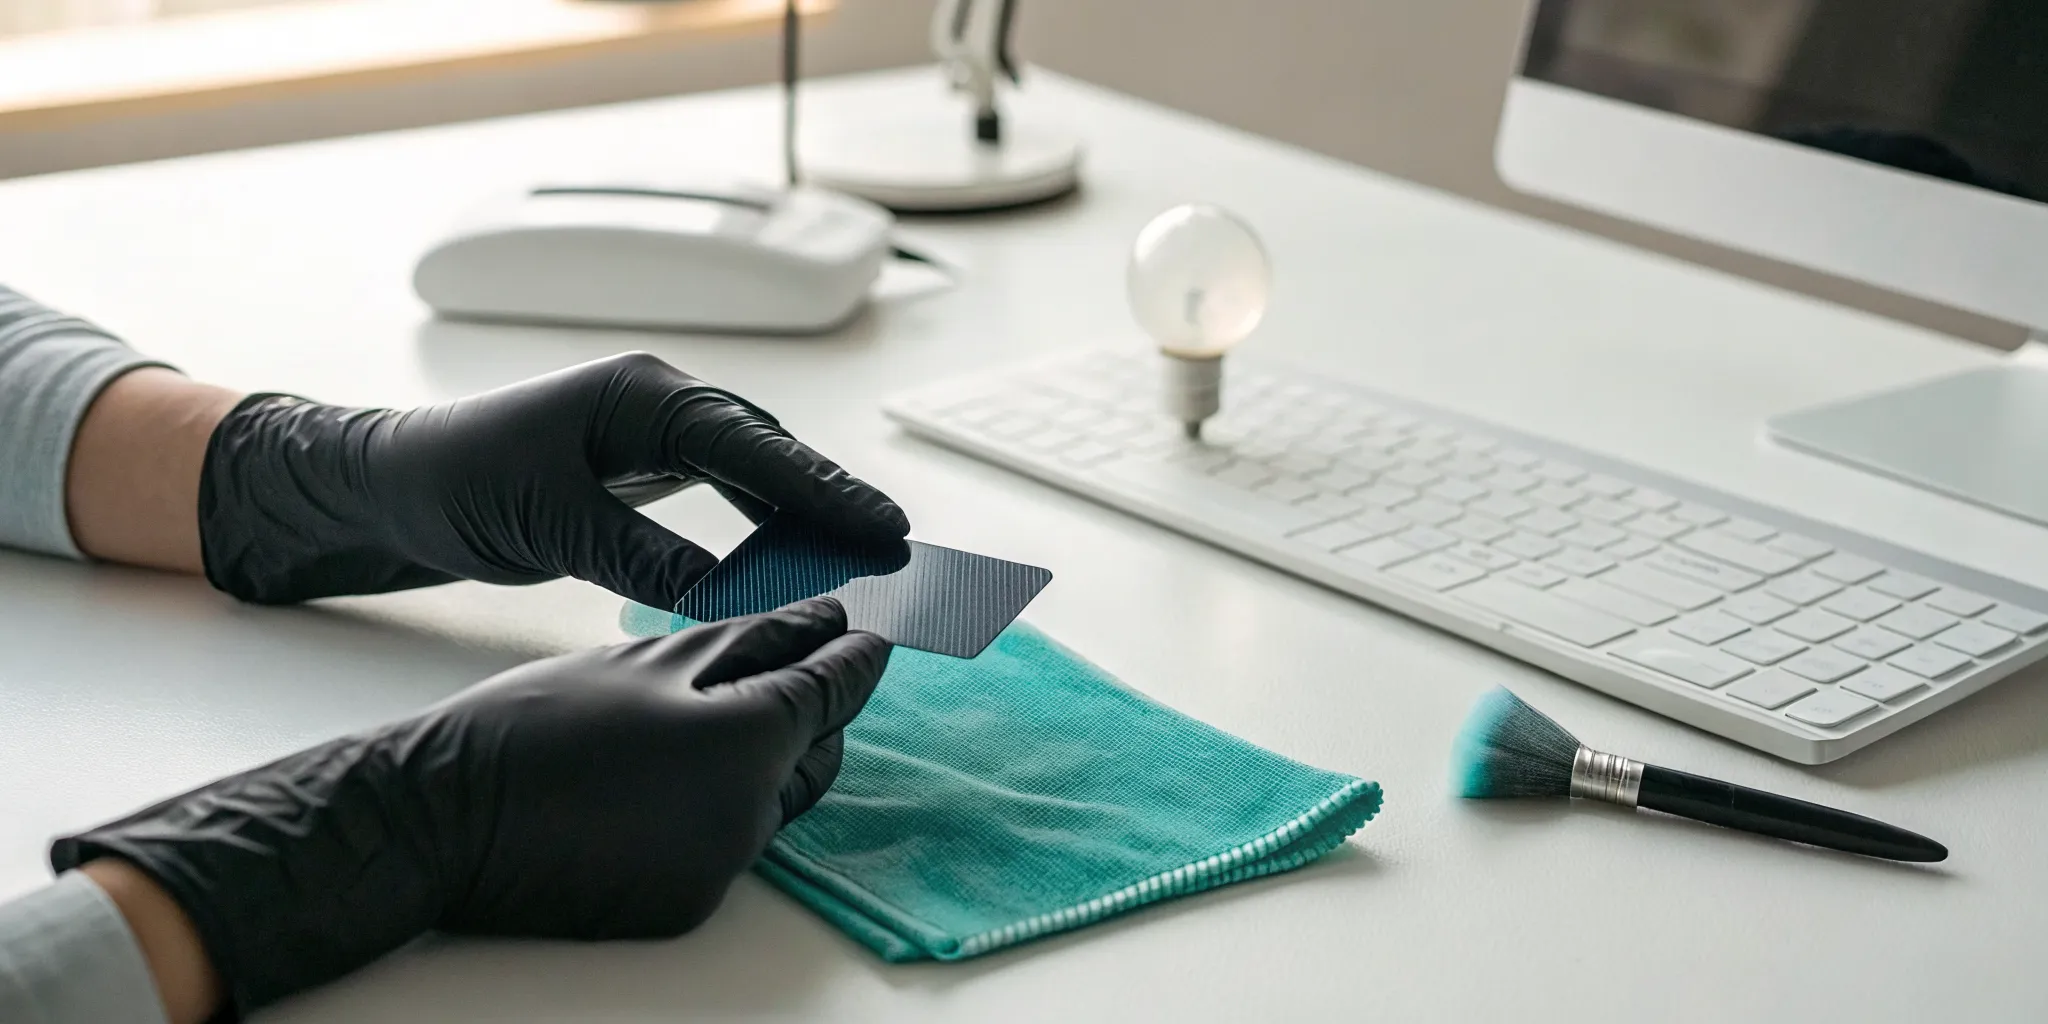
Gather Your Essential Tools
Before you touch a card, make sure you have the right gear. You don’t need a complicated kit, just a few simple items. The most important tool is a clean, soft microfiber cloth. These cloths are designed to trap dust and oils without scratching delicate surfaces. Some collectors suggest using a small, thin microfiber cloth, similar to one you’d use for eyeglasses, to get the best results. You’ll also want a pair of cotton gloves to prevent adding new fingerprints, a well-lit and clean workspace, and some Q-tips for any potential spot treatments. Having everything ready and within reach will help you handle the card minimally and efficiently.
Master the Gentle Breath-and-Wipe Technique
One of the safest and most effective methods for removing light dust or a faint fingerprint is the breath-and-wipe technique. It’s simple and uses minimal moisture, which is exactly what you want. Start by holding the card carefully by its edges. Breathe on the card’s surface to create a light fog, just like you would when cleaning sunglasses. Immediately after, take your clean microfiber cloth and gently wipe the surface. The key is to wipe from the center outward to push any debris off the edge instead of grinding it into the card or snagging the corners. This gentle approach is often all you need to clear up minor surface imperfections.
Use a Minimal Moisture Approach
Sometimes, a stubborn smudge might require more than just a dry wipe. This is where you need to be extremely careful. While some collectors have found success using a Q-tip with a tiny amount of distilled water, the risk of damage is high. If you choose to try this, use very, very little water. Lightly dampen the Q-tip, then press it against a dry paper towel until it’s almost dry to the touch. Gently dab only the specific spot on the card, and never let any liquid sit on the surface. It’s critical to avoid cleaning liquids or chemicals, as they can cause permanent, irreversible damage to the card’s ink and finish.
Follow a Step-by-Step Cleaning Guide
To bring it all together, here’s a simple process to follow. First, put on your cotton gloves and inspect the card under a bright light to identify any areas that need attention. Use the breath-and-wipe technique with your microfiber cloth, always moving from the center to the edges. For any persistent spots, consider the minimal moisture Q-tip method with extreme caution. Once you’re finished, give the card one last gentle wipe. The final, crucial step is to immediately place the card in a new, clean penny sleeve. From there, slide it into a top loader or card saver for protection. This ensures your freshly cleaned card stays safe from new dust or damage.
What to Avoid When Cleaning Cards
Knowing how to clean a card is only half the battle. Just as important is knowing what not to do. A single wrong move can turn a potential gem into a permanently damaged piece of cardboard. The goal is to enhance the card's natural state, not to perform a rescue mission that ends up doing more harm than good. Many common household cleaning methods are disastrous for trading cards, leading to issues that grading companies will spot immediately.
Before you touch your card, review these common mistakes. Avoiding these pitfalls is crucial for preserving your card’s condition and giving it the best possible shot at a high grade. Think of this as your "do not" list, a guide to protecting your collection from irreversible errors. From the products you use to the pressure you apply, every detail matters. Let’s walk through the biggest mistakes collectors make so you can sidestep them entirely.
Steer Clear of Harsh Chemicals and Liquids
This is the number one rule of card cleaning: never use liquids or chemicals. It might be tempting to grab a bottle of Windex or a dab of rubbing alcohol to tackle a stubborn spot, but these substances will cause permanent damage. Trading cards are made of paper and ink, both of which react terribly to moisture. Liquids can warp the cardstock, cause colors to bleed, and dissolve the protective glossy finish. Even a single drop of water can leave a permanent stain. Stick to dry cleaning methods only. Your card’s integrity depends on it.
Say No to Abrasive Materials
Put down the paper towel. While it might seem soft, paper towels, napkins, and even the corner of your cotton t-shirt contain abrasive fibers that can leave behind fine scratches on the card’s surface. These micro-scratches can dull the finish and lower the card's grade. In a worst-case scenario, using the wrong material could leave enough marks for a grading company to consider the card marked as "altered", which is a label you want to avoid at all costs. Always use a high-quality microfiber cloth, as its soft, non-abrasive fibers are designed to trap dust and oil without scratching delicate surfaces.
Don't Over-Clean or Over-Handle
Enthusiasm is great, but too much of it can be a bad thing when cleaning cards. Applying excessive pressure can be just as damaging as using the wrong materials. Rubbing too hard can wear away the card's glossy coating, bend corners, or even create new creases. Remember, you are gently dusting a delicate collectible, not scrubbing a dirty dish. The "less is more" approach is always best. Handle the card as little as possible, holding it by the edges to avoid adding more fingerprints. A quick, light wipe is often all that’s needed.
Recognize When a Card Is Beyond Cleaning
It’s crucial to have realistic expectations. Cleaning is meant to remove surface-level issues like dust, fingerprints, or a tiny bit of residue. It is not a magic eraser for existing damage. If a card has deep scratches, creases, soft corners, or faded ink, no amount of cleaning will fix the damage. Trying to "repair" these flaws will almost certainly make them worse and could be seen as an attempt to alter the card. Assess the card honestly before you begin. If the issues are part of the card's structure, it's best to leave it alone and accept the condition as is.
How to Handle Cards After Cleaning
Once your card is clean and dry, the job isn't over. How you handle, store, and inspect it from this point forward is just as important as the cleaning itself. This final phase is all about preserving the card's condition and preparing it for the grading process, ensuring your hard work pays off. Think of it as the final prep before the main event; it’s where you protect your investment and give your card the best possible shot at a high grade. Many collectors focus so much on the cleaning that they rush these final steps, which can be a costly mistake. A single fingerprint, a bent corner from a clumsy sleeving job, or damage during shipping can undo everything you just accomplished. This is the part of the process that requires patience and a steady hand. It’s about treating the card with the respect it deserves, especially after you’ve put in the effort to restore its appearance. By developing a consistent and careful post-cleaning routine, you build habits that will serve you well across your entire collection. We’re going to walk through exactly what you need to do, from the moment the microfiber cloth is put down to the moment the package is in the mail. These steps will help you feel confident that you’ve done everything in your power to secure that top grade.
Store Cards in Fresh Sleeves and Savers
Your first move after cleaning is to get the card into proper protection. Don't reuse old sleeves or top loaders; they can hold onto dust and oils that you just worked so hard to remove. Always start with fresh supplies. Carefully slide the card into a new penny sleeve, paying close attention to the corners to prevent any accidental dings or softening. Once it’s sleeved, the next layer of defense is a semi-rigid holder. Many experienced collectors prefer these because they hold the card securely without being too tight. Products like Card Savers are the industry standard for submissions to grading companies. This two-layer system provides a soft, scratch-free home for the card while protecting it from bends and impacts.
Use Safe Handling Techniques Before Submission
Every time you touch the card, you risk leaving behind evidence. To a grader, a fingerprint isn't just a smudge; it's a surface flaw that can lower the grade. Before handling your cleaned card, always wash and dry your hands thoroughly to remove any natural oils or dirt. The best practice, and the one used by professionals, is to hold the card only by its edges. This simple habit minimizes contact with the card's delicate surface and holographic areas, keeping it looking pristine. You just put in the effort to clean the card, so don't undo your progress with a careless touch. This discipline is small, but it makes a huge difference in maintaining the card’s condition right up until it’s sealed and sent off.
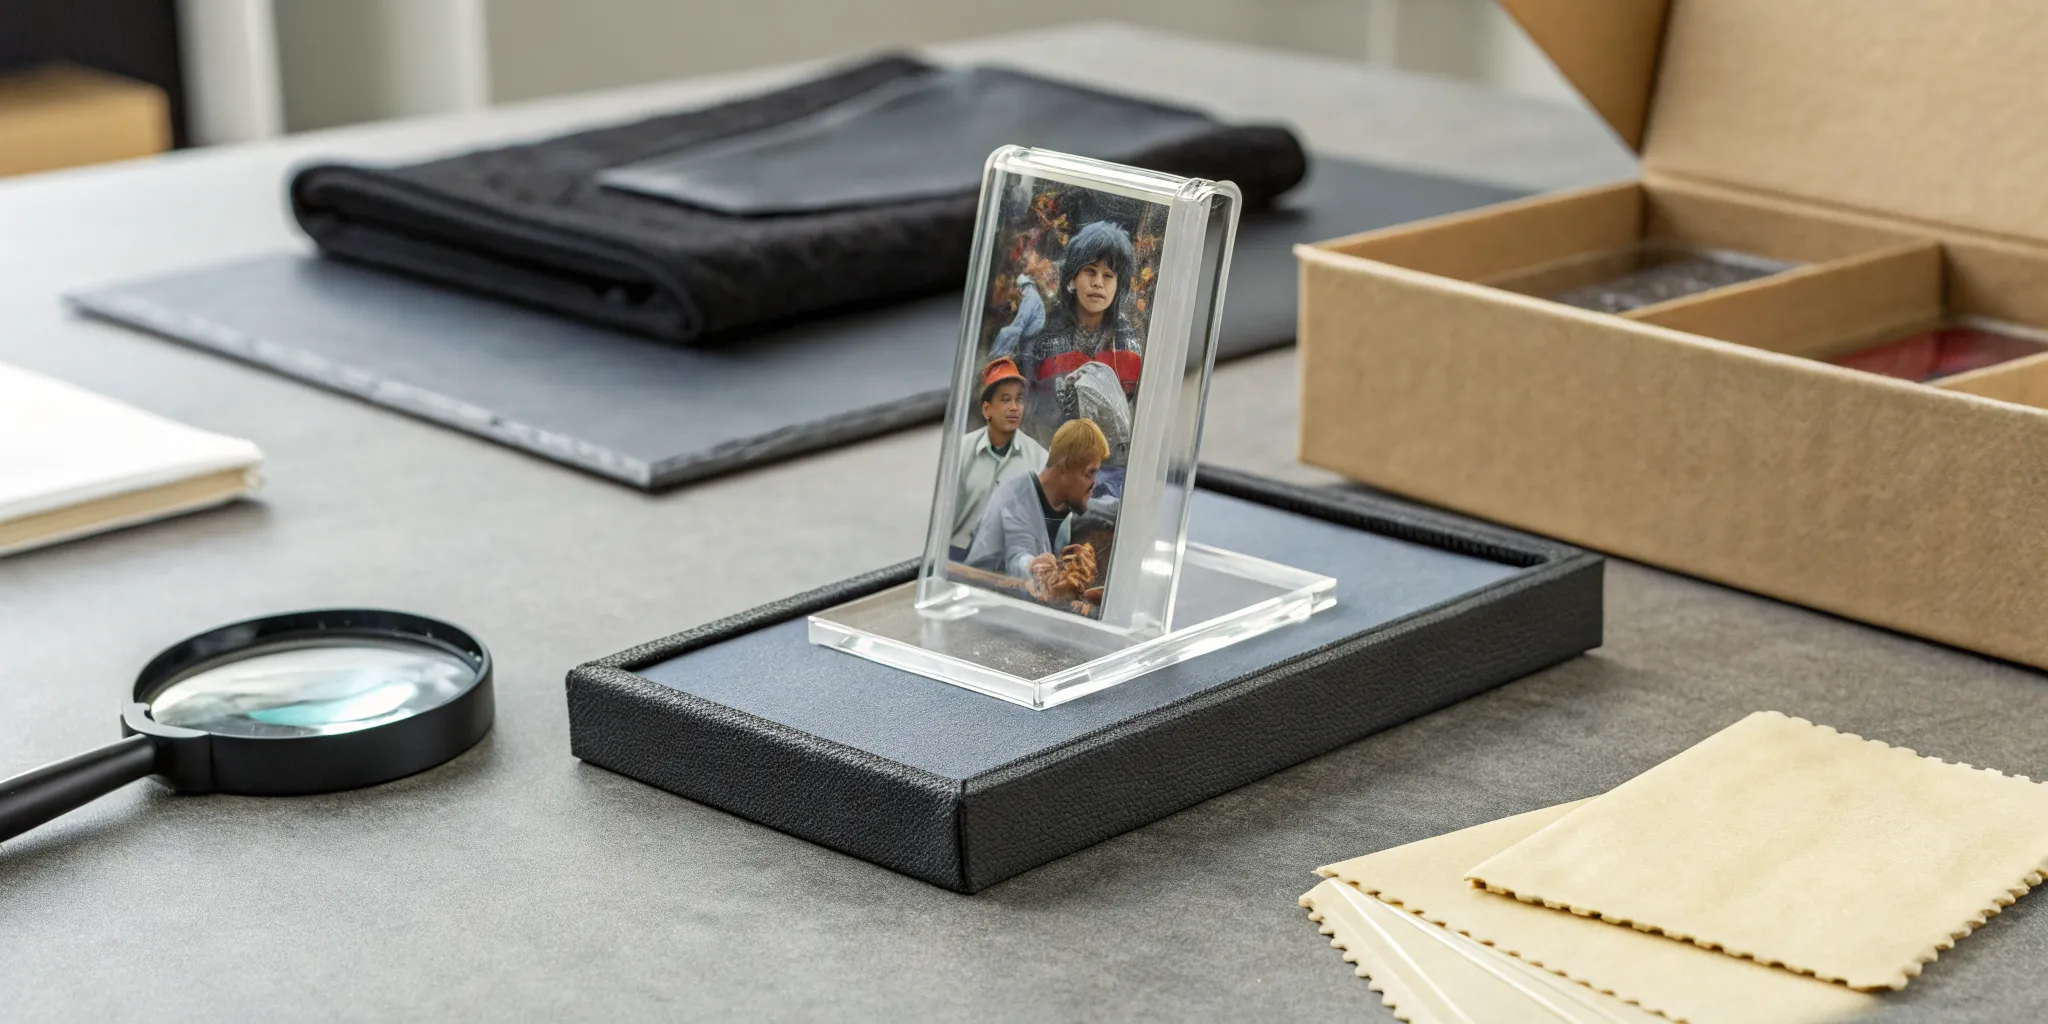
Run Through a Final Inspection Checklist
Before you pack the card for shipping, it’s time to play the role of a pre-grader. This final inspection is your last chance to catch anything you might have missed. Place the card under a bright, direct light source and examine it closely. A magnifying tool can be a huge help here. Look at the surface for any remaining smudges, fine scratches, or print lines. Check all four corners for any signs of whitening or softness. Run your eyes along the edges to spot any potential chipping. Finally, assess the centering. A card with even borders is much more likely to score high. This final check helps you understand your card’s potential grade and manage your expectations before sending it in.
Protect Your Cards on Their Way to Grading
You’ve done all the hard work to get your card in top shape; now you need to make sure it arrives at the grading facility safely. Your packaging is its only defense against the rigors of shipping. After placing your card in its sleeve and semi-rigid holder, sandwich it between two pieces of clean, flat cardboard for extra stability. Wrap this bundle securely in bubble wrap to provide cushioning against drops and impacts. Place it in a sturdy, well-fitting shipping box, and use packing peanuts or more bubble wrap to fill any empty space. This prevents the card from shifting around during transit. Always check the grading company’s specific shipping guidelines, as they often have detailed instructions to ensure your submission is processed smoothly.
Related Articles
Frequently Asked Questions
Is it always a good idea to clean a card before grading? Not always. Cleaning is best for removing minor surface issues like fingerprints or dust from an otherwise high-quality card. If a card has existing damage like creases, deep scratches, or faded color, cleaning won't fix it. In those cases, it's better to leave the card as is, since trying to repair damage can get it flagged as altered.
What's the biggest mistake people make when cleaning cards? The most common and damaging mistake is using any kind of liquid. Water, window cleaner, or rubbing alcohol can instantly warp the cardstock, make the ink bleed, and ruin the glossy finish. A simple, dry microfiber cloth is the safest and most effective tool for the job.
Can cleaning fix existing damage like scratches or soft corners? No, cleaning cannot repair damage that is already part of the card's structure. Its purpose is only to remove surface debris like dust or fingerprints. Attempting to buff out a scratch or stiffen a corner is considered altering, which grading companies penalize heavily. It's important to accept a card's existing flaws rather than risk making them worse.
My card looks clean. Do I still need to wipe it down? It’s a good practice, even for cards that appear perfect. Cards straight from a pack can have factory dust or faint smudges that are hard to see with the naked eye but can be spotted by a professional grader. A quick, gentle wipe with a microfiber cloth is a safe, standard step to ensure you're presenting the card in its best possible condition.
What should I do immediately after I finish cleaning a card? The moment you're done, your priority is protection. You should immediately place the card into a brand new, clean penny sleeve to protect it from dust and scratches. After that, slide it into a semi-rigid holder, like a Card Saver, to keep it from bending. This ensures all your careful work isn't undone by a stray fingerprint or accidental bump.
Recommended Reading
GameStop Graded Cards: Cost, Process & Is It Worth It?
Get the facts on GameStop graded cards—cost, step-by-step process, and tips to decide if grading and selling your cards through GameStop is right for you.
Your Guide to Pokémon TCG Booster Pack Opening Simulators
Find the best Pokémon TCG booster pack opening simulator for virtual pack-opening fun. Compare features, pull rates, and tips for collectors.

How to Sell Sports Cards for Cash Near Texas
Find out how to sell sports cards for cash near Texas with tips on local shops, card shows, and online options to get the best value for your collection.