
January 2, 2026
How to Prepare Cards for Grading: A Simple Guide
Learn how to prepare cards for grading with easy steps for cleaning, handling, and packaging to help your cards earn the best possible grade.
You pulled a monster card. Whether it’s a vintage Charizard or a rookie sports card, you know it has potential. But the difference between a great card and a legendary grade often comes down to the little things. A single fingerprint or a barely-there scratch can be the deciding factor between a PSA 9 and a Gem Mint 10—a difference that can mean thousands of dollars in value. This isn't about luck; it's about precision. Learning how to prepare cards for grading is the most critical step you can take to protect your investment and maximize its potential. This guide will walk you through the exact, actionable steps to clean, inspect, and package your cards like a pro, giving them the best possible shot at that top-tier grade.
Key Takeaways
- Assess Your Cards Critically Before Submission: Save time and money by carefully inspecting your cards for centering, corner sharpness, edge whitening, and surface flaws. This honest evaluation helps you prioritize which cards are actually worth the cost of grading.
- A Gentle Touch is Your Best Cleaning Tool: The safest way to prep your card's surface is with a clean, dry microfiber cloth. Avoid all chemicals and liquids, as they can cause irreversible damage and will lower your card's final grade.
- Follow Each Grading Company's Rules Exactly: Every grader has a unique set of submission guidelines, from the specific card holders they accept to how you fill out the forms. Reading and following their instructions precisely is the best way to prevent delays or having your submission returned.
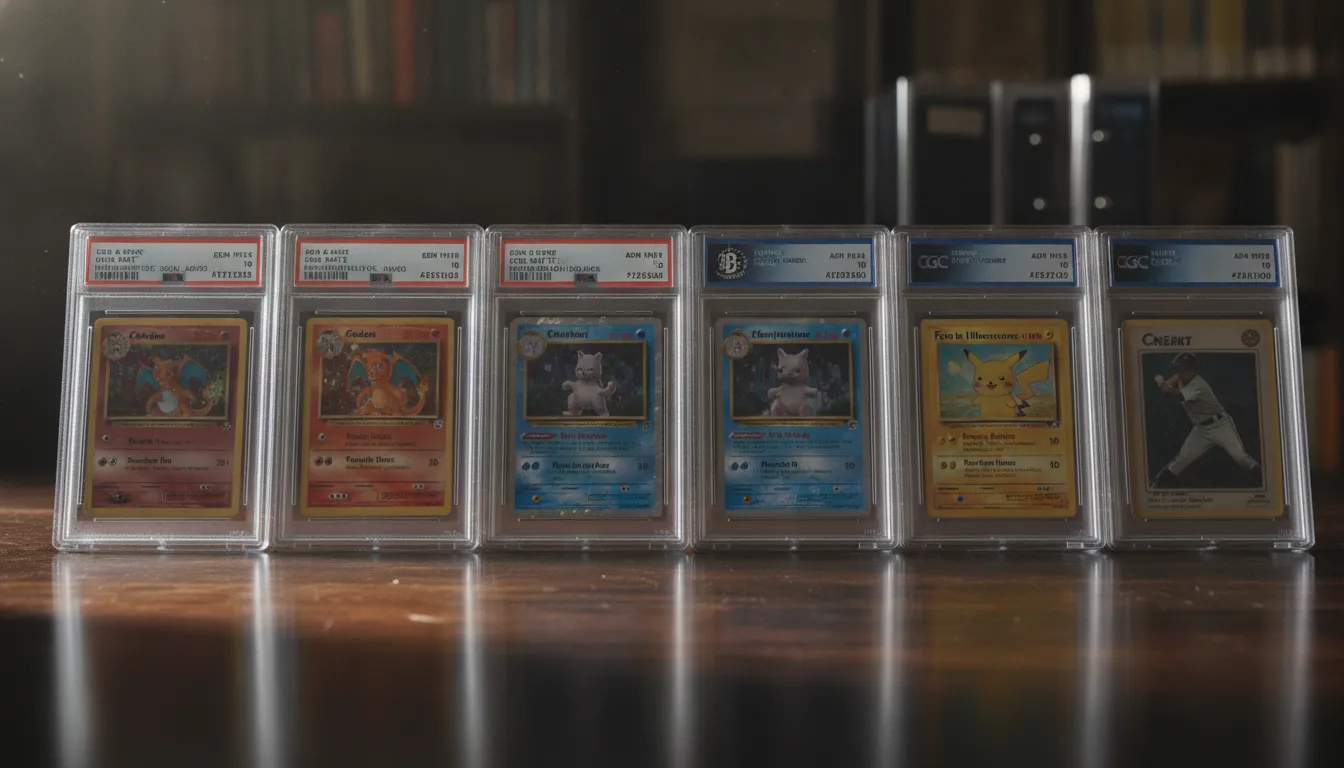
What Is Card Grading Prep?
Card grading prep is simply the process of carefully inspecting, cleaning, and protecting your cards before sending them off to be professionally graded. Think of it as getting your card ready for its big moment. The goal is to present it to the graders in the best possible condition to help it earn the highest grade it can. This isn't about trying to fix damage, but rather about making sure minor, fixable issues like fingerprints or dust don't hurt your score.
The process starts with a thorough examination. You’ll want to look at your card under a good light, checking every detail: the surface for any scratches or smudges, the corners for sharpness, the edges for any whitening, and the centering of the print. Tools like a magnifying glass can help you spot things the naked eye might miss. After your inspection, the next step is a gentle cleaning. Using a clean microfiber cloth is usually all you need to wipe away any surface dust or oils. The key is to be extremely careful and avoid any harsh chemicals or abrasive materials that could damage the card's delicate surface.
What to Expect from the Grading Process
Once your card is prepped, the next step is sending it in. The grading process itself is fairly standardized, but every company has its own specific rules you absolutely must follow. Before you pack anything, you need to check the submission guidelines of the grading company you’re using. For example, PSA is very particular and requires you to place cards in specific holders like Card Saver 1s, not standard top loaders. Sending your card in the wrong type of holder could get your submission delayed or even rejected. After the company receives your card, they’ll authenticate it, assign it a grade, and seal it in a protective case, often called a "slab."
Why Prepping Your Cards Matters
So, why go through all this trouble? Because proper prep work can directly impact your card’s final grade and, therefore, its value. Taking the time to clean and inspect your cards greatly increases their chance of getting the best possible grade. Even tiny issues like smudges, bad edges, or slightly damaged corners can be the difference between a perfect 10 and a 9 or lower. For many high-value cards, that single point drop in the grading scale can mean a difference of hundreds or even thousands of dollars. A little bit of effort upfront can pay off big time when you get that grade back from the experts.
First Steps: Assess Your Card's Condition
Before you even think about packing up your cards, the most important first step is to give them an honest evaluation. Think of yourself as the first line of defense in the grading process. This initial assessment helps you set realistic expectations and decide which cards are actually worth the time and money to get graded. A card might look perfect at a glance, but professional graders use magnification and trained eyes to catch every tiny flaw.
By carefully examining your cards yourself, you can spot potential issues that could lower the grade. This step saves you from spending money to grade a card that will only come back with a disappointing score. It allows you to prioritize your best cards—the ones with a real shot at that gem mint status. We’ll walk through the four key areas that graders focus on: the surface, corners and edges, centering, and any print defects. Taking the time to do this now will make a huge difference in your results.
Inspect the Surface
Start by looking closely at the front and back surfaces of your card under a bright light. You’re on the hunt for any imperfections that could bring down the grade. This includes things like scratches, scuffs, print lines, or small indentations. Sometimes, a card comes straight out of a pack with minor surface flaws. Use a soft, clean microfiber cloth to gently wipe away any dust or fingerprints, but that’s it. Never use water, chemicals, or any kind of polish, as these will cause irreversible damage. A small magnifying glass or a jeweler's loupe can be a great tool for spotting tiny blemishes that are invisible to the naked eye.
Evaluate Corners and Edges
The condition of the corners and edges is a huge factor in a card's final grade. For a card to be considered near-mint or better, its corners must be sharp and crisp. Examine each of the four corners for any signs of wear, such as rounding, softness, or fraying. Even a tiny bit of wear on one corner can prevent a card from getting a perfect 10. Next, inspect the edges of the card. Look for any "whitening," which happens when the colored ink along the edge gets chipped or worn away, exposing the white paper stock underneath. This is a very common issue, especially on older cards, and is a clear sign of handling. Poor corner and edge quality are often the first things a grader will notice.
Analyze the Centering
Centering refers to how the artwork is positioned within the card's borders. In a perfectly centered card, the border is the same width on the left and right, and the same width on the top and bottom. Most cards aren't perfectly 50/50 centered, and grading companies allow for a small margin of error. For instance, a card might still get a top grade if it has 60/40 centering. You can get a good sense of the centering just by looking, but if you want to be more precise, you can use a card centering tool. This is a transparent overlay with marked lines that helps you quickly measure the border ratios. A card can be flawless in every other way, but poor centering will always hold it back from a top grade.
Spot Print Defects and Damage
Finally, scan the card for any factory flaws or hidden damage. Print defects are imperfections that occurred during the manufacturing process. These can include things like stray ink dots, fuzzy printing, color spots, or faint lines across the holofoil. These aren't considered damage from handling, but they still affect the grade. You should also look for subtle damage that’s easy to miss, like very light creases or dimples that only show up when you tilt the card in the light. Running your finger gently over the surface can sometimes help you feel for imperfections that you can't see. A thorough inspection from multiple angles under good lighting is key to catching everything.
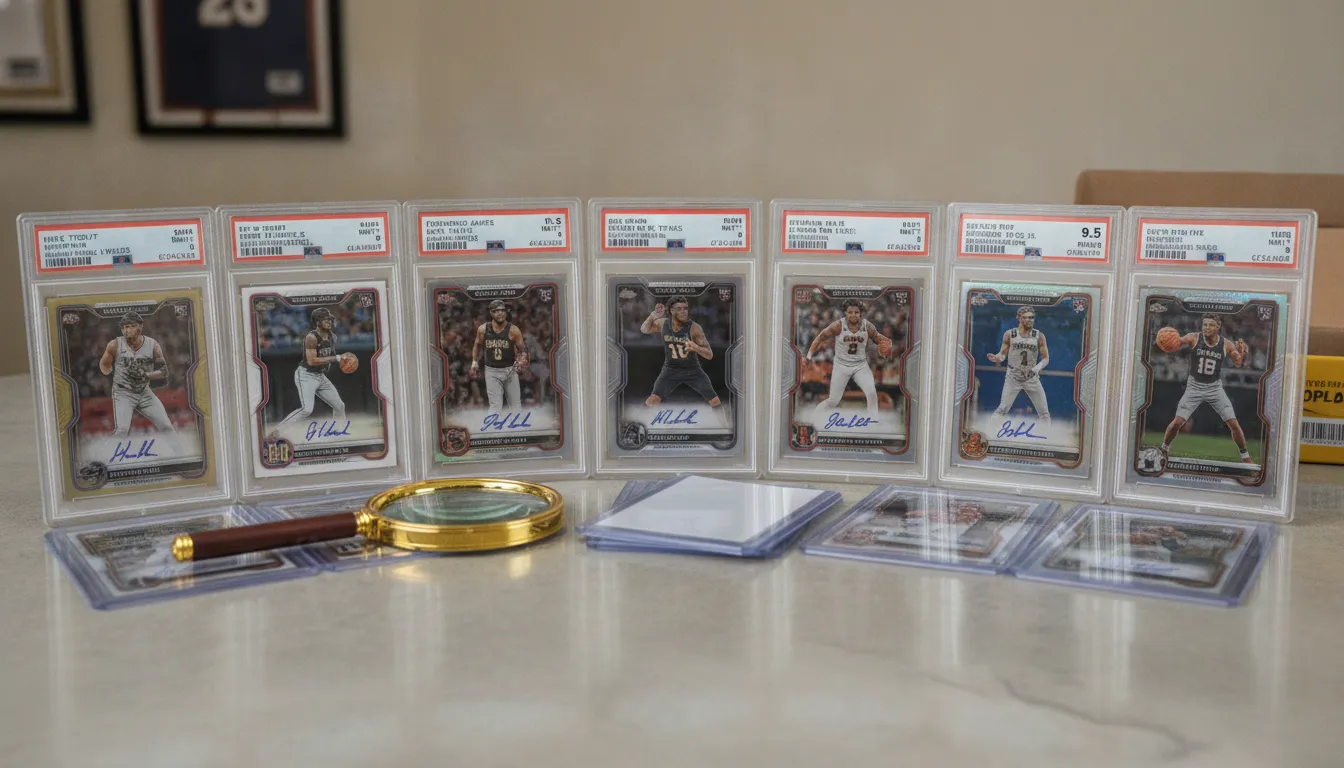
Your Card Prep Toolkit
Getting your cards ready for grading isn’t complicated, but it does require a few specific tools. Having the right gear on hand makes the process much smoother and helps you protect your investment. Think of it like a surgeon's tray—every tool has a purpose, from initial inspection to final protective storage. Here’s a breakdown of the essentials you’ll need to build your own card prep toolkit.
Inspection Tools (Magnifying Glass, Blacklight, Ring Light)
A close look is the first and most important step. A magnifying glass or a jeweler's loupe is your best friend for spotting tiny imperfections that are invisible to the naked eye. Use it to get a close-up view of corners, edges, and the surface to check for whitening, scratches, or print dots that could impact the grade. A blacklight is another great tool, especially for holographic cards, as it can help you identify subtle scratches or surface issues you might miss under normal light. Finally, a simple ring light provides consistent, shadow-free illumination, making it much easier to see any surface flaws like dents or faint scuffs.
Cleaning Supplies (Microfiber Cloth, Cotton Swabs)
Once you've inspected your cards, a gentle cleaning can make a big difference. Your primary tool here should be a clean, high-quality microfiber cloth. It’s perfect for safely wiping away fingerprints, dust, and minor smudges without scratching the card’s surface. For any stubborn spots, you can carefully use a cotton swab. If you need a bit more cleaning power, lightly dampen the swab with a tiny drop of distilled water, but be extremely cautious. Gently dab the spot and avoid the edges of the card at all costs to prevent any moisture from seeping in and causing damage. Remember, the goal is a light touch-up, not a deep clean.
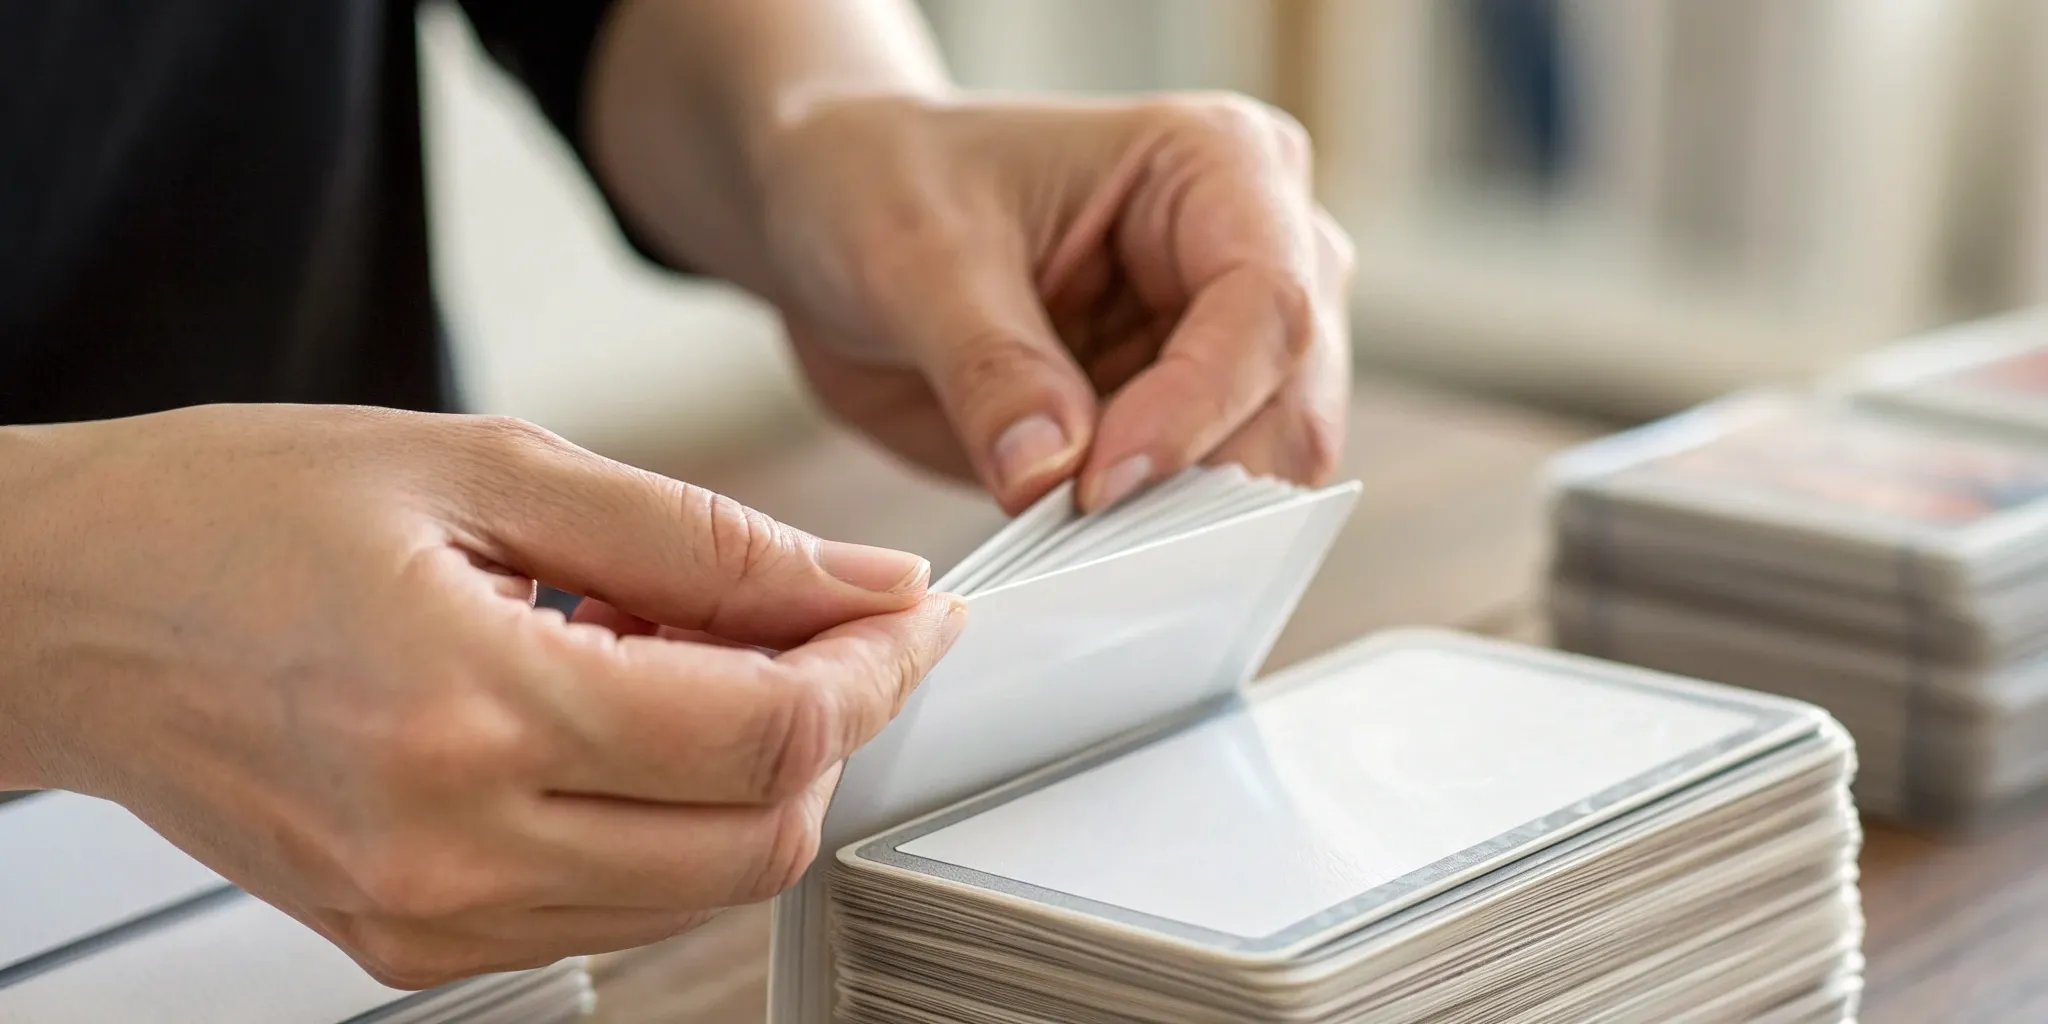
Protective Storage (Card Saver 1s, Penny Sleeves, Top Loaders)
After cleaning, proper storage is key to keeping your card safe until it reaches the grader. The first step is placing your card into a brand new penny sleeve. This protects the surface from scratches and dust. Next, you’ll want to slide it into a semi-rigid card holder. The industry standard, and what grading companies prefer, are Card Saver 1s. They hold the card snugly, preventing it from shifting during transit. While standard top loaders are great for your personal collection, you should avoid using them for submissions because they allow the card to move, which can lead to damaged corners and edges.
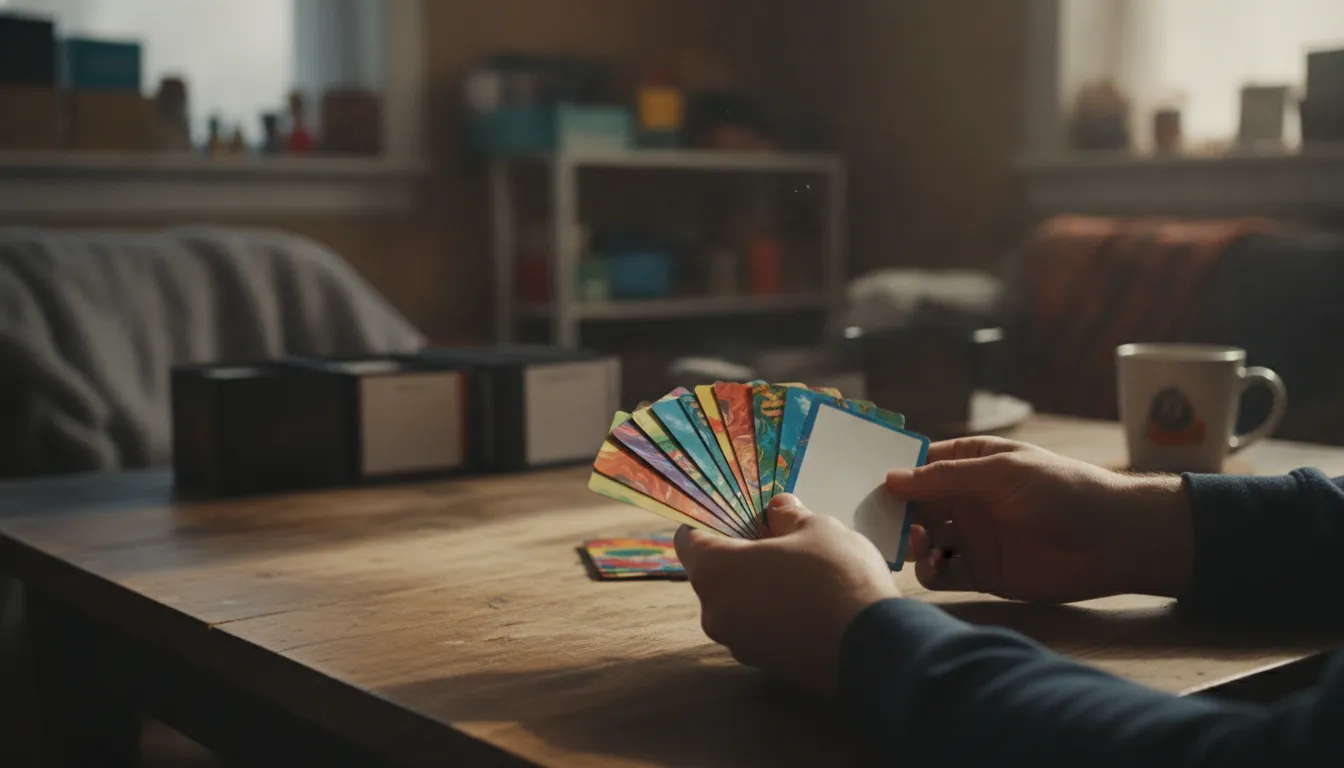
How to Safely Clean and Handle Your Cards
Once you’ve inspected your card, it’s time for a gentle cleaning. This step is all about finesse—the goal is to remove surface-level dust, fingerprints, and minor residue without altering the card itself. A careful touch can be the difference between a good grade and a great one. Think of it as preparing your card for its big moment. Let’s walk through the right way to handle and clean your cards to get them ready for submission.
Start with Clean Hands and a Gentle Touch
This might seem basic, but it’s the most critical rule of handling trading cards. Before you touch anything, wash and dry your hands thoroughly. The natural oils, lotions, or dirt on your fingers can easily transfer to the card’s surface, leaving smudges that can impact its grade. As the experts at Forensic Card Grading note, this simple step is your first line of defense against unwanted blemishes. Handle your cards by the edges whenever possible to minimize contact with the front and back surfaces.
Clean Gently with a Microfiber Cloth
For general surface cleaning, a soft, clean microfiber cloth is your best friend. These cloths are designed to pick up dust and oils without scratching the delicate surface or holographic foil. When you wipe the card, use a light touch. A great technique recommended by PSA is to wipe from the center of the card outward toward the edges. This motion pushes any debris off the card instead of accidentally grinding it into the corners, which are especially prone to damage. Never apply heavy pressure; a few gentle passes should be enough to remove most fingerprints and dust.
Tackle Stubborn Spots with Cotton Swabs
What if you notice a stubborn bit of residue that the microfiber cloth can’t handle? This is where a cotton swab can come in handy for precision work. Unlike a cloth, a Q-tip allows you to target a specific spot without rubbing the entire card surface. For a little extra cleaning power, you can very slightly dampen the cotton swab with a tiny bit of distilled water—just enough to make it semi-wet, not dripping. Gently dab or roll the swab over the spot to lift the residue. Use a dry swab immediately after to remove any moisture.
Cleaning Products to Avoid
This is a non-negotiable rule: never use cleaning liquids or chemicals on your cards. Products like Windex, rubbing alcohol, or even water in large amounts can cause irreversible damage. They can strip the gloss from the card, make the ink bleed, or weaken the cardstock, leading to stains and warping. Both professional graders and seasoned collectors agree that you should not use any cleaning products. Sticking to a dry microfiber cloth and, only when absolutely necessary, a lightly dampened cotton swab is the safest and most effective way to prepare your cards for grading.
How to Package Your Cards for Submission
Once you've cleaned and prepped your cards, the final step is getting them to the grading company safely. How you package your submission is just as important as the prep work itself. A well-packaged submission protects your cards from bumps, drops, and shifts during transit, ensuring they arrive in the exact same condition you sent them. Think of it as the last line of defense for your potential GEM MINT 10. Let's walk through exactly how to create a secure package for your prized cards.
Choose the Right Sleeves and Holders
First things first, let's get your card dressed for the trip. Always start by handling your card with clean, dry hands, holding it only by the edges. Gently slide it into a soft penny sleeve. This is your card's first layer of protection against dust and surface scratches. Next, place the penny-sleeved card into a semi-rigid card holder. Most grading companies, like PSA, specifically request these because they're easy to open without damaging the card. Avoid hard plastic top loaders or magnetic one-touch cases for submissions, as they can be difficult for graders to handle and might even be rejected.
Protect Your Cards with Bubble Wrap
With your cards individually sleeved and secured, it's time to bundle them up. A great method is to create a cardboard sandwich. Place your stack of semi-rigid holders between two pieces of cardboard that are slightly larger than the cards themselves. Use painter's tape or rubber bands to hold the sandwich together securely—avoid scotch tape, which can be a pain to remove. Once your bundle is secure, wrap it generously in bubble wrap. You want a thick, cushioned layer on all sides to absorb any shocks or impacts during its journey.
Find a Secure Shipping Box
Your bubble-wrapped bundle needs a sturdy home for its trip. Don't just toss it in a flimsy envelope. You'll want a strong cardboard shipping box that won't get crushed easily. A great, cost-effective option is a free small flat-rate box from USPS. Before placing your card bundle inside, create a "bird's nest" with more bubble wrap or packing paper at the bottom. Place your cards in the center, then fill any empty space around them. The goal is to make sure nothing can shift or slide around inside the box.
Consider Temperature and Humidity During Shipping
While you can't control the weather, you can minimize your card's exposure to extreme conditions. Drastic changes in temperature or high humidity can potentially warp cards, even inside their holders. Whenever possible, drop your package off inside the post office rather than leaving it in an outdoor dropbox where it might sit in the sun or rain. Make sure your box is taped securely on all seams to create a better seal against moisture. And before you seal it up for good, do one final check to ensure your submission form and payment info are included.
Follow the Grading Company's Rules
Think of this as the golden rule of card grading: always follow the specific instructions of the company you're submitting to. Whether you choose PSA, BGS, SGC, or another grader, each has its own unique process and requirements. It might seem tedious, but taking the time to read their official submission guidelines before you even pack your first card will save you a world of headaches later. These rules aren't suggestions; they're requirements that ensure your cards are processed smoothly and safely.
Failing to follow their instructions can lead to significant delays, extra fees, or even your entire submission being rejected and sent back to you. The guidelines cover everything from how to fill out the paperwork and what kind of sleeves to use, to how they want you to package your cards for shipping. Before you do anything else, pull up their website and read through the instructions from start to finish. It’s the single most important step you can take to ensure a successful submission.
Fill Out Submission Forms Correctly
Accuracy is your best friend when it comes to submission forms. You’ll need to provide specific details for each card, including the year, set, card number, and player or character name. It’s crucial to get this information exactly right. If you’re unsure, look up the card online to verify the details. An incomplete or inaccurate form is one of the most common reasons for delays. Take a few extra minutes to double-check every field before you finalize your submission. It’s a small step that prevents big problems down the line.
Choose Your Service Level and Payment
Grading companies offer different service levels, which usually correspond to turnaround time and the card's "declared value." This is the value you assign to the card for insurance purposes. Be realistic and research your card's current market value to choose the right tier. If you undervalue your card and it receives a high grade, the company may contact you to pay an "upcharge" to move it to the correct service level. Understanding the pricing structure helps you manage costs and avoid unexpected fees, ensuring your submission process is as smooth as possible.
Know Their Specific Packaging Rules
How you package your cards for transit is critical. The goal is to make sure they arrive in the exact same condition you sent them. Most companies have a preferred method. Generally, this involves placing your card in a penny sleeve and then into a semi-rigid holder. You’ll then stack these protected cards, secure them between cardboard, wrap the stack in bubble wrap, and place it in a sturdy shipping box. Never just toss your cards in an envelope. Following the company’s specific packaging rules ensures your prized possessions are protected every step of the way.
Avoid Prohibited Sleeves and Materials
This is a detail that trips up a lot of first-timers. Different grading companies have strict rules about the types of sleeves and holders they will accept. For example, PSA famously requires you to use semi-rigid holders like Card Saver 1s and will not accept cards submitted in hard plastic top loaders. This is because it’s easier and safer for their team to remove cards from semi-rigid holders. Using the wrong supplies can result in your submission being returned. Always confirm which materials are approved before you start sleeving your cards.
Common Mistakes to Avoid When Prepping Your Cards
Getting a card ready for grading can feel a bit like a science experiment, and it’s easy to make a simple mistake that costs you grade points. After all the effort you’ve put into finding and assessing your cards, the last thing you want is a preventable error during the prep phase. From using the wrong cleaning supplies to simply touching the card the wrong way, small missteps can lead to big deductions from graders. Even a single fingerprint or a slightly dinged corner can be the difference between a Gem Mint 10 and a 9.
The good news is that most of these mistakes are completely avoidable once you know what to look for. It’s all about developing a careful, consistent routine. Think of it like this: graders are looking for perfection, so your job is to present your card as flawlessly as possible. This means paying close attention to how you handle, clean, and store your cards right before sending them off. We’ll walk through some of the most common pitfalls—like improper handling and choosing the wrong supplies—so you can sidestep them and give your cards the best shot at a high grade.
Improper Handling
This might sound basic, but it’s the number one cause of accidental damage. The natural oils, dirt, and lotions on your hands can easily transfer to a card’s surface, leaving smudges and residue that can be tough to remove. Always wash and dry your hands thoroughly before you start. When you pick up a card, hold it gently by its edges to avoid touching the front or back surfaces. The goal is to minimize contact as much as possible. As soon as you’ve inspected it, slide it directly into a soft penny sleeve to protect them from fingerprints and damage. This simple habit is your first line of defense against preventable flaws.
Using the Wrong Cleaning Methods
When you spot a piece of dust or a fingerprint, your first instinct might be to grab a household cleaner. Resist that urge. You should never use any cleaning liquids, chemicals, or abrasive materials on your cards. Products like Windex, alcohol wipes, or even water can soak into the cardstock, causing discoloration, warping, and permanent damage that will instantly lower the grade. Stick to the tools in your prep kit, like a dry microfiber cloth for surface dust and a cotton swab for stubborn spots. Patience and a gentle touch are far more effective and safer than any chemical solution.
Choosing the Wrong Supplies
The sleeves and holders you use for shipping are just as important as the ones you use for storage. While top loaders and magnetic one-touch holders are great for your personal collection, they aren’t ideal for submission. Grading companies specifically advise against them because they can cause damage to your cards in transit. A card can shift inside a rigid holder, leading to dinged corners or edge wear. Instead, place your card in a penny sleeve and then slide it into a semi-rigid holder like a Card Saver 1. These hold the card securely without putting too much pressure on it, ensuring it arrives at the grading facility in the same condition you sent it.
Over-Handling and Leaving Fingerprints
Even with clean hands, the more you handle a card, the higher the risk of accidents. Every time you take it out of its sleeve for "one last look," you create another opportunity for a fingerprint or a dinged corner. Once you’ve cleaned and prepped a card, your work is done. If you do notice a fingerprint you missed, use a soft microfiber cloth to gently wipe it off, holding the card by its edges. Then, get it sleeved and into a semi-rigid holder immediately. Trust your initial assessment and let the card rest safely in its protective case until it’s time to pack it for shipping.
How to Get the Best Possible Grade
Getting a high grade is about more than just having a card in great condition. It’s also about playing your cards right—pun intended—when it comes to the submission process itself. A little strategy goes a long way in turning a great card into a perfectly graded slab. From knowing when to send your cards in to understanding the economics of grading, a few key decisions can make all the difference. By thinking like a pro before you even pack your box, you give your collection the best shot at achieving those top-tier grades that every collector dreams of. Let's walk through how to approach your submission with a clear plan.
Time Your Submission
It’s tempting to rush a submission right after you pull a monster card, but patience is your best friend in the grading game. Rushing often leads to missed details, like a tiny surface scratch or a poorly cleaned fingerprint that could knock your grade down a full point. Taking the time to properly prepare your cards is the most important step you can take. Set your cards aside, give them a thorough inspection under good lighting, clean them carefully, and let them sit for a day. A second look can often reveal something you missed in your initial excitement. There’s no deadline, so use the time to your advantage and ensure every card is as perfect as you can make it.
Decide Which Cards Are Worth Grading
Not every card is a candidate for grading, even if it’s from your favorite player or Pokémon. The hard truth is that grading costs money, and you want to make sure you’re making a smart investment. Before you even think about filling out a submission form, do some research. Look up the card’s potential value at different grade levels. You can check recent sales on marketplace sites to see what a PSA 9 or a BGS 10 of your card is actually selling for. If the cost of grading is higher than the value it adds, you might be better off keeping the card raw or in a one-touch holder for your personal collection.
Set Realistic Expectations
It’s important to go into the grading process with a level head. A card that looks flawless to you might not look that way under a grader’s magnifying glass. One of the most common reasons for a lower-than-expected grade is centering. A card can be perfect in every other way—sharp corners, clean surface, crisp edges—but if the centering is off, it will likely not get a Gem Mint 10. Graders are trained to spot imperfections we might overlook. Understanding the four main criteria of grading (centering, corners, edges, and surface) will help you assess your cards more accurately and avoid disappointment when the results come in.
Weigh the Costs vs. Potential Value
The cost of grading isn’t just one flat fee; it’s tied to the service level you choose, which is based on your card’s "declared value." This is the value you estimate the card will have after it’s graded. Be honest and accurate here. If you declare a low value to save on fees but the card receives a high grade that pushes its market value way up, the grading company will likely charge you the difference for the appropriate service level. It’s a standard practice to ensure cards are properly insured and handled. Review the grading company’s fee structure carefully to understand the full potential cost before you commit to sending your cards.
How to Store and Organize Your Cards Before Submission
Once your cards are clean and assessed, the final step is getting them organized for their journey to the grading company. Proper storage and organization protect your cards and make the submission process much smoother. This prep work ensures there are no hiccups or damage in transit, giving you peace of mind while you wait for those grades.
Store Cards in a Climate-Controlled Space
Where you keep your cards matters. Extreme temperatures and humidity can cause cards to warp, so avoid storing them in basements or attics. A stable, climate-controlled room is best. Before handling, wash and dry your hands to prevent transferring oils to the card’s surface. Hold cards by their edges and immediately place them into a soft penny sleeve. Proper archival storage is non-negotiable for maintaining a card’s condition before it's sent out.
Take Photos to Document Condition
Before sealing your package, take clear photos of each card. This creates a personal record of their condition before they leave your possession. Use good lighting and a plain background to capture the front and back. If you spotted any specific flaws, like a soft corner or a print line, take close-ups of those areas. These photos are useful for insurance purposes or if any issues arise during shipping or grading. It’s a simple step that provides an extra layer of security.
Organize Your Submission Batch
Staying organized will save you a major headache. If you’re sending multiple cards, group them in the order they appear on your submission form. Many collectors organize by set or player to keep things simple. When you fill out the grading company’s submission forms, double-check every detail, like the card’s year and set. Accuracy is key, as mistakes can cause delays. Most grading companies have a submission portal that walks you through the process to get the details right.
Keep Detailed Records
Creating a master list or spreadsheet of your submission is a pro move. For each card, log its name, year, condition notes, and the photos you took. Once you complete the forms, you’ll receive a submission number—add that to your records. This document is your central hub for tracking the batch. Remember to print your completed forms and include them inside the box with your payment information. This record-keeping helps you stay on top of your submission’s status and manage your collection’s value.
Related Articles
- Cash for Graded Cards: A Complete Seller's Guide | Packz Blog
- The Smart Collector's Guide to Buying Graded Cards | Packz Blog
Frequently Asked Questions
Can I fix a damaged corner or a scratch before sending my card in? This is a common point of confusion, but card prep is about cleaning, not restoration. The goal is to present the card in its best original condition by removing things like fingerprints or dust. Trying to repair a soft corner, a crease, or a surface scratch will almost always cause more damage and will be easily spotted by professional graders. It’s best to be honest about the card’s condition and focus only on gentle, surface-level cleaning.
What's the single biggest mistake people make when submitting cards? Hands down, the most common and avoidable mistake is not reading the grading company's specific submission guidelines. Every company has its own set of rules for everything from which card holders to use (like Card Saver 1s instead of top loaders) to how to fill out the forms. Ignoring these instructions is the fastest way to get your submission delayed or even sent back to you unprocessed. Taking ten minutes to read their rules will save you a massive headache.
How do I figure out the 'declared value' for the submission form? The declared value is your best estimate of what the card will be worth after it's graded. A great way to determine this is to look up recent sales of your card in both raw (ungraded) condition and at various graded levels on sites like eBay or PriceCharting. This research helps you choose the correct service tier and ensures your card is properly insured. Be realistic with your assessment to avoid any surprise upcharges later on.
Is it always worth it to get a card graded? Not necessarily. Grading is an investment, so you should think about the potential return. Before submitting, compare the total cost of grading and shipping to the card's potential value at a high grade. If a card in mint condition is only worth a little more than the grading fee, it might be better to keep it in your personal collection. Focus on grading cards that have a significant value increase with a high grade or hold special importance to you.
Why can't I just use a regular top loader to ship my cards? While top loaders are great for storing your collection at home, they aren't ideal for shipping to a grader. A top loader is rigid but leaves a small gap, which allows the card to shift and slide around during transit. This movement can easily cause whitening on the edges or damage to the corners. Semi-rigid holders, which are what most graders require, hold the card snugly in place, preventing that damaging movement and ensuring it arrives safely.
Recommended Reading
Pokemon Cards to Invest in 2026: Best Vintage and Modern Picks
Schedule your search for the best Pokemon cards to invest in 2026. This guide covers vintage blue-chips, modern chase cards, and sealed product strategies.
A Graded Sports Cards Beginner Guide: How to Start Collecting
Start your graded sports cards collection today. This graded sports cards beginner guide covers grading, budget tips, and buying with confidence on modern...
PSA vs BGS vs CGC grading 2026: Complete Guide
Start your collection journey with our PSA vs BGS vs CGC grading 2026 comparison to find the best card grading service for maximum resale value today.