
April 3, 2026
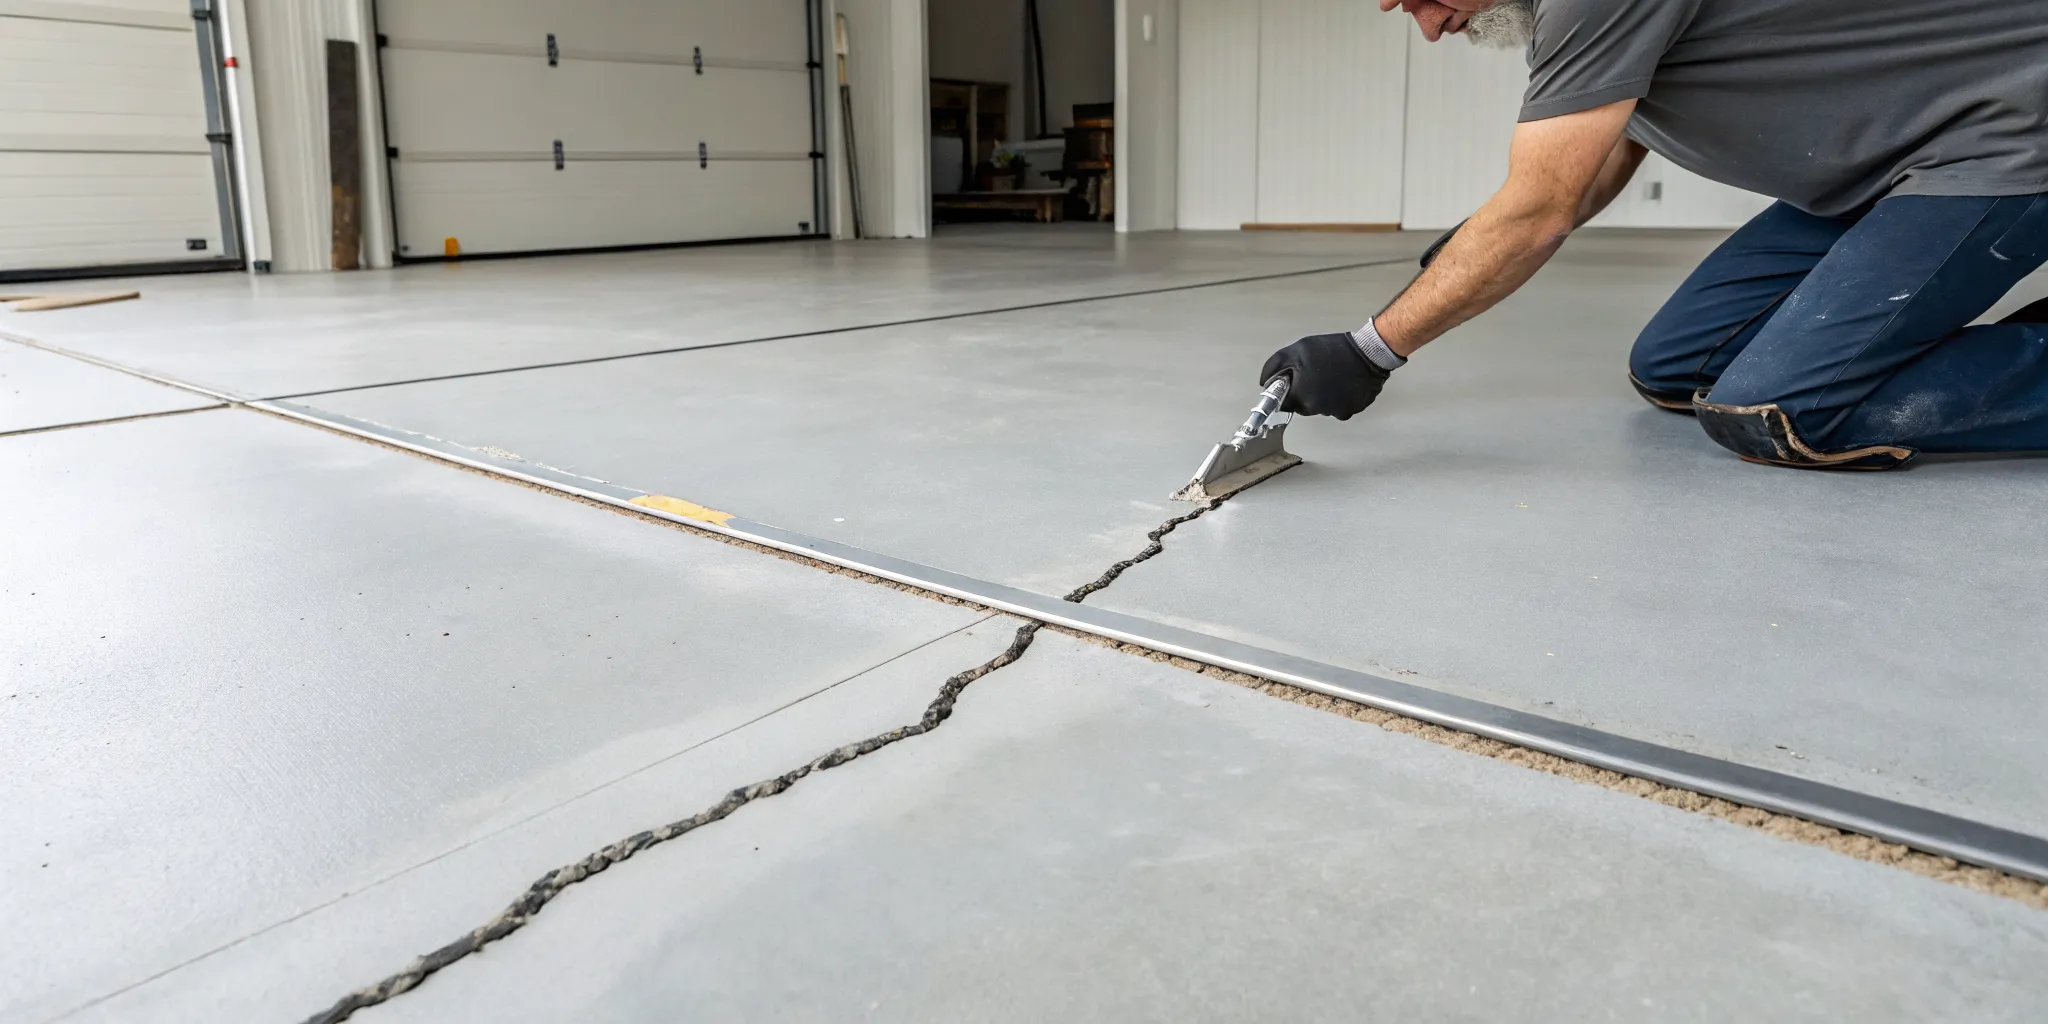
How to Fix a Cracked Slab: A Simple DIY Guide
Learn how to fix a cracked slab with clear, step-by-step DIY instructions, tips for choosing materials, and advice on preventing future cracks.
Before you can properly repair a crack in your concrete, you need to play detective. Not all cracks are created equal; some are harmless signs of settling, while others might point to a more serious structural issue. The shape, width, and direction of the crack tell a story about what’s happening beneath the surface. Is it a dormant fracture or an active one that’s still growing? Answering these questions is the most important step toward a successful repair. This article will teach you how to read the signs, and then provide detailed, step-by-step instructions on how to fix a cracked slab based on what you discover.
Key Takeaways
- Read the Crack Before You Repair: The most important step is to understand what you're dealing with. Identifying the crack's cause, measuring its size, and checking if it's still growing will tell you whether it's a simple DIY fix or a job for a professional.
- Good Prep Makes a Good Patch: A lasting repair depends entirely on your prep work. Taking the time to thoroughly clean out debris and widen the crack's edges gives the filler the best possible surface to bond to, ensuring your fix holds up over time.
- Match the Filler to the Fissure: There is no one-size-fits-all solution for concrete cracks. Use a flexible sealant for small hairline issues, but for wider or deeper gaps, you'll need a more robust approach like using a backer rod and epoxy filler to restore the slab's strength.
Why Do Concrete Slabs Crack?
If you’ve got a crack in your concrete slab, you’re not alone. There’s a common saying among builders that there are two types of concrete: concrete that has cracked, and concrete that will crack. While it might be frustrating to see a fracture in your driveway or garage floor, it’s often a normal part of a home settling over time. Most small cracks are harmless, but understanding why they happen is the first step to a successful repair.
The cause of a crack usually comes down to one of four things: the ground shifting underneath, temperature changes, a mistake during the initial pour, or too much weight. Each cause creates a different kind of stress on the slab. By figuring out the likely culprit behind your crack, you can choose the right repair method and feel confident that your fix will last. Let’s walk through the most common reasons your concrete might have cracked.
Shifting Soil and Settlement
The ground beneath your home isn’t perfectly still. Over time, the soil can shift, expand, or compact due to changes in moisture or pressure. This process is called settlement, and it’s a completely natural part of a house aging. When the soil foundation moves, even slightly, it puts immense pressure on the rigid concrete slab above it. Because concrete isn’t flexible, it relieves that stress by cracking. These are often called settlement cracks and are usually nothing to worry about unless they become very wide or one side becomes higher than the other. Understanding soil settlement can help you recognize these common, hairline fractures.
Weather and Temperature Swings
Concrete is a bit of a living material; it breathes and moves with the weather. When it’s first poured, it shrinks as it cures and dries, a process that can create small cracks. After it’s cured, it continues to react to temperature changes. During a hot summer day, the slab will expand slightly. When a cold front moves in, it will contract. This constant cycle of thermal expansion and contraction puts a lot of stress on the slab. Over many seasons, this repeated movement can form new cracks or make existing ones worse, especially in climates with dramatic temperature swings.
Flaws in the Initial Installation
Sometimes, a crack’s origin story goes all the way back to the day the concrete was poured. A proper installation is key to a slab’s long-term durability. If the original concrete mix had too much water, for example, the final slab will be weaker and more prone to cracking. Another common issue is improper curing, where the slab dries out too quickly, creating internal stress. The ground underneath, known as the subgrade, also needs to be properly compacted and leveled. Any of these common pouring mistakes can create a weak spot that eventually gives way and forms a crack.
Too Much Weight and Heavy Traffic
While concrete is incredibly strong, it has its limits. Every slab is designed to handle a certain amount of weight, and exceeding that limit can cause it to fracture. This might happen if you park a heavy vehicle, like an RV or a large truck, on a standard residential driveway. It can also be caused by placing a very heavy object, like industrial equipment or a large safe, on a garage or basement floor. Even repeated traffic from regular cars can cause stress over many years. These types of cracks are caused by external loading conditions that push the slab beyond its breaking point.
How Serious Is the Crack?
Before you grab your tools, take a moment to play detective. Not all cracks are created equal, and understanding the one you’re dealing with is the key to a successful repair. Some are just minor cosmetic issues, while others can signal a deeper problem with your foundation. Figuring out the severity will help you choose the right materials and decide whether this is a job you can handle yourself or one that’s best left to a professional. A few simple observations can tell you everything you need to know about the crack’s story and how to give it a proper ending.
Measure the Crack's Width and Depth
First, get a good look at the size of the crack. Use a tape measure or a crack-width gauge to get an accurate reading. A hairline crack might not be a major concern, but anything wider than a quarter of an inch deserves closer attention. You’ll also want to check the depth. You can use a thin wire or a feeler gauge to see how far down it goes. These measurements are crucial because they help you determine the appropriate repair method. A shallow, narrow crack might only need a simple filler, while a deep, wide one will require a more robust solution.
Identify the Crack's Type and Pattern
Next, observe the crack’s shape and direction. Is it a straight line, or does it branch out in a spiderweb pattern? Straight cracks often point to issues with settling, while V-shaped cracks can indicate structural stress. The pattern can give you clues about the underlying cause. For example, cracks that run parallel to walls might be from shrinkage during the curing process, which is usually not a structural threat. Understanding the type and pattern of the crack helps you address the root problem, not just the symptom you see on the surface.
Know When to Call a Professional
It’s important to know your limits. If you’re looking at a crack that’s wider than half an inch, or if one side of the crack is higher than the other, it’s time to put down your tools and pick up the phone. These are signs of significant movement or structural issues that a simple DIY fix won’t solve. Also, look for other warning signs around your property, like cracks in your interior walls or doors that suddenly stick. When in doubt, getting advice from a professional can save you a lot of time, money, and stress down the road.
What Tools and Materials Will You Need?
Before you can jump into the repair, you need to gather your supplies. Having everything on hand before you start makes the whole process go much smoother. Think of it as setting up your workspace for success. The right tools and materials not only make the job easier but also ensure your repair is strong and lasts for years. Let’s walk through exactly what you’ll need to get your concrete slab looking great again.
Gather Your Tools and Safety Gear
First things first: safety. Working with concrete and repair compounds can be messy and potentially hazardous, so it’s important to protect yourself. Grab a pair of heavy-duty gloves and some safety glasses before you do anything else. Once you’re geared up, you’ll need a few tools to prep the crack. A wire brush is essential for cleaning out loose debris. For a deeper clean, a pressure washer or a shop vacuum works wonders. You might also need a hammer and chisel to widen the crack slightly, which helps the filler bond more effectively. Following some basic DIY safety tips will keep your project on track and accident-free.
Match Repair Materials to the Crack Size
The size of the crack will determine the type of repair material you should use. It’s not a one-size-fits-all situation. For hairline cracks, a simple concrete sealant might be all you need. However, for any crack wider than a quarter of an inch, you’ll want to use a foam backer rod. A backer rod is a flexible foam rope that you press into the crack before adding the filler. This simple step provides a solid base for the sealant and reduces the amount of filler you need, saving you money and creating a more durable repair.
Choose the Right Filler: Epoxy, Polyurethane, or Concrete
Now it’s time to pick your filler. The three most common options are epoxy, polyurethane, and concrete fillers, and each has its strengths. Polyurethane sealants are great for areas with a lot of movement because they stay flexible after curing. If you need a more rigid, structural repair, an epoxy kit is your best bet; it creates an incredibly strong bond and is ideal if you plan to paint or coat the slab later. For a repair that blends in seamlessly, you can use a cement-based concrete filler that will closely match the texture of your existing slab. Choosing the right concrete crack filler for your specific situation is key to a long-lasting fix.
How to Prep Your Concrete Slab for Repair
Before you even think about mixing up filler, you need to get your hands dirty with some prep work. I know it’s not the most exciting part, but trust me, this is where the magic happens. A successful, long-lasting repair is all about creating the perfect surface for the new material to bond to. Skipping these steps is the top reason DIY repairs fail. Taking a little extra time now to clean, shape, and inspect the crack will ensure your fix holds up against traffic, weather, and time.
Clean Out Dirt and Debris
First things first, you need to get that crack completely clean. Any dirt, dust, or loose concrete left behind will prevent the filler from sticking properly. Grab a stiff wire brush and give the inside of the crack a thorough scrubbing, then use a shop vac to suck out all the debris. For a really deep clean on outdoor slabs, a pressure washer can blast away any stubborn grime. The goal is a totally bare surface, giving your repair material the best chance to form a strong bond.
Prepare the Edges of the Crack
Once the crack is clean, it’s time to give the filler more to hold on to. Most hairline cracks are wider at the surface and get narrower deeper down, which isn’t ideal for a strong repair. Using an angle grinder or a hammer and chisel, carefully widen the base of the crack to create a "V-notch" shape. This technique gives the patch more surface area to grip. It also removes any weak or crumbling concrete along the edges, ensuring your filler is only bonding to solid material.
Check for Moisture and Structural Problems
Before you start filling, take a moment to play detective. Is the crack damp? You’ll need to let it dry completely, as most fillers won’t cure on a wet surface. You should also assess if the crack is a sign of a bigger issue. If it’s wider than half an inch, or if you’re seeing other warning signs like bulging walls, it’s time to call a structural engineer. A small, stable crack is usually a straightforward DIY fix, but a large or growing one could point to serious foundation movement that a simple patch won’t solve.
A Step-by-Step Guide to Fixing Small Cracks
Fixing small cracks in your concrete slab is a totally manageable weekend project. With the right approach and a little patience, you can stop minor issues from turning into major headaches. Following these steps will help you create a durable repair that blends in with the surrounding surface.
Prepare the Surface
First things first, you need a clean workspace. Any dirt, dust, or crumbling bits of concrete left in the crack will prevent the filler from creating a strong bond. Grab a stiff wire brush and a shop vacuum to thoroughly clean out the crack and the area around it. For stubborn grime, a pressure washer can work wonders, but make sure the concrete is completely dry before you move on to the next step. A clean, dry surface is the key to a long-lasting repair.
Apply the Concrete Crack Filler
With the crack prepped, it’s time to apply your filler. For smaller cracks (less than a half-inch wide), a flexible polyurethane or epoxy-based concrete sealant is your best bet. Load the sealant into a caulking gun and apply a steady bead directly into the crack, making sure to fill it completely. If the crack is a bit deeper, you can insert a foam backer rod first. This little trick helps you use less filler and gives the sealant a solid base to sit on.
Smooth and Finish the Repair
After filling the crack, you’ll want to smooth out the surface for a clean finish. Use a putty knife or a small trowel to level the filler, feathering the edges so they blend with the existing concrete. It’s a good idea to leave the filler slightly mounded above the surface, as it will often shrink a little as it cures. Check the product’s instructions for the recommended curing time. Once it’s fully hardened, you can use a grinder to smooth down any high spots for a seamless look.
How to Tackle Large or Deep Cracks
When you’re facing a crack that looks more like a canyon than a simple line, a basic filler won’t be enough. Large or deep cracks often signal more significant issues and require a more robust approach to ensure a lasting repair. Don’t worry, this doesn’t always mean you have to call in a professional. With the right techniques, you can handle these bigger jobs yourself. The key is to go beyond just filling the surface and instead focus on adding stability and strength from within the crack itself. We’ll cover three effective methods: using a backer rod for wide gaps, injecting epoxy for deep fissures, and applying structural techniques for the most severe breaks.
Insert a Backer Rod
If your crack is wider than a quarter of an inch, your first step should be to insert a backer rod. Think of it as a flexible foam rope that you press into the crack before adding any filler. Its main job is to take up space, which saves you from using an entire tube of expensive epoxy or sealant on a single crack. It also provides a solid base for the filler to sit on, preventing it from sinking to the bottom of the crack. To use one, simply choose a foam backer rod that’s slightly wider than the crack and use a screwdriver or putty knife to push it in, leaving about a half-inch of space at the top for your repair material.
Use an Epoxy Injection
For cracks that are deep or run through the entire thickness of the slab, a surface patch is like putting a bandage on a broken bone. It doesn’t fix the underlying problem. This is where an epoxy injection comes in. This method involves injecting a structural epoxy deep into the crack to essentially glue the concrete back together. This process doesn’t just fill the void; it helps reinforce the crack against future movement and stress. You’ll typically drill small holes along the crack, install special injection ports, and then use a dual-cartridge gun to force the low-viscosity epoxy into the fissure until it’s completely full. It’s a highly effective way to restore the slab’s original strength.
Apply Structural Repair Techniques
When you're dealing with a large, broken piece of concrete or a crack that has caused the slab to become uneven, you may need a more structural approach. This is the most intensive DIY repair, but it’s the right way to fix major damage. The process involves carefully breaking up and removing the loose, damaged concrete. Then, you’ll drill angled holes into the solid, existing slab and insert pieces of rebar (steel reinforcing rods). This technique of adding rebar acts like a bridge, physically connecting the old concrete to the new patch you’ll pour. This creates a powerful bond that restores the structural integrity of the entire slab, ensuring the repair is strong and permanent.
Match the Repair Method to the Crack Type
Before you mix up any filler, it’s important to understand that not all cracks are the same. Some are simple cosmetic issues, while others can signal a deeper problem with your foundation. The shape, size, and behavior of a crack tell a story about what’s causing it. Learning to read these signs is the key to choosing a repair method that will actually last, saving you from having to fix the same spot again in a few months. Let's break down what to look for.
Repairing Settlement vs. Stress Cracks
First, take a close look at the crack’s shape. A relatively straight, uniform crack is often the result of normal concrete settlement as the ground shifts slightly over time. These are common and usually don't point to a major issue. However, if you see a V-shaped crack that’s wider at the top than the bottom, it’s time to pay closer attention. This pattern typically indicates structural stress, meaning the slab is under a load it can’t support. While you can patch a simple settlement crack yourself, a V-shaped stress crack is a strong signal that you should consider calling a professional. Learning how to inspect concrete cracks for severity is the first step to a proper repair.
Handling Active vs. Dormant Cracks
Next, you need to figure out if the crack is still growing. A "dormant" crack is stable and isn't getting any bigger, making it a good candidate for a DIY repair. An "active" crack, on the other hand, is a sign of an ongoing problem, like persistent soil movement. To check, grab a pencil and mark the exact ends of the crack, then write the date next to your marks. Measure its width and jot that down, too. Come back in a month or two and check your work. If the crack has grown past your marks or gotten wider, it’s active. Filling an active crack without addressing the root cause is a temporary fix at best. This simple monitoring process helps you determine if cracks are active or dormant and decide on the right long-term solution.
How to Finish and Cure Your Repair
You’ve filled the crack, and the hard part seems to be over. But don’t put your tools away just yet. The final steps of finishing and curing are what separate a temporary patch from a long-lasting, professional-looking repair. Getting the surface smooth, allowing the material to cure properly, and keeping an eye on your work will ensure your concrete slab stays stable and strong for years to come. It’s all about giving your repair the right environment to set correctly and making sure the original problem is truly solved.
Smooth the Surface and Match the Texture
A clean finish isn't just about looks; it helps the repair blend in and stand up to wear and tear. After applying your filler, use a trowel to smooth it out. It’s a good idea to leave the patch slightly higher than the surrounding concrete, as most fillers tend to shrink a bit as they dry. Once the material has fully cured (always check the manufacturer's instructions for timing), you can grind or sand it down. This will create a seamless transition between the patch and the original slab, making the repair much less noticeable. For a really professional look, you can even find tools to match the concrete texture.
Follow the Right Curing Process
Curing is a critical step that allows the repair material to gain its full strength. It’s not just about drying; it’s a chemical process that needs moisture to happen correctly. If you used a concrete patching compound, it can take up to 28 days to fully harden. To prevent the patch from drying too quickly and cracking, you should lightly mist it with water every day for at least the first week. This slow and steady process, known as moist curing, helps the new material form a strong, durable bond with the old concrete, ensuring your hard work lasts.
Perform a Final Quality Check
Once your repair is finished and cured, your last job is to play detective. Keep an eye on the area to make sure the crack doesn't come back. A simple way to do this is to mark the ends of the original crack with a pencil or a small dab of paint. Check on it every few months to see if the crack has grown past your marks. If you notice it getting wider, longer, or if one side becomes higher than the other, it could signal a deeper issue with your foundation. Significant changes mean it’s time to consult a structural engineer to get a professional opinion.
How to Prevent Cracks in the Future
You’ve put in the work to fix that crack, and the last thing you want is a new one showing up. A little preventative maintenance goes a long way in keeping your concrete slab solid for years to come. By focusing on a few key areas, you can protect your investment and avoid future repair jobs. It’s all about staying ahead of the game. Here’s what to keep an eye on to make sure your concrete stays in top shape.
Manage Drainage and Water Flow
Water is one of the biggest culprits behind cracked concrete. When water pools around your slab, it can soften and erode the soil underneath, creating voids and causing the concrete to settle and crack. Proper drainage is essential to prevent water from pooling around the foundation, which can lead to soil erosion and increased pressure on the slab. Make sure your gutters are clean and downspouts direct water at least five feet away from the foundation. The ground around your slab should also have a gentle slope away from it, encouraging water to run off instead of soaking in. A simple landscaping grade can make a huge difference.
Control Heavy Loads and Traffic
Your concrete slab is strong, but it has its limits. Placing too much weight on it, especially in one concentrated spot, can cause stress fractures. This is particularly true for driveways or garage floors that weren't engineered for heavy machinery or oversized vehicles. You should avoid placing excessive weight on concrete slabs, as heavy loads can lead to cracking and structural damage. Be mindful of where you park work trucks, RVs, or dumpsters. If you’re planning a project that involves heavy materials, try to distribute the weight evenly and avoid leaving it in one spot for too long. Understanding your slab's load-bearing capacity can help you avoid costly mistakes.
Stick to a Regular Inspection Schedule
The best way to deal with cracks is to catch them before they become big problems. A small hairline crack is much easier and cheaper to fix than a wide, structural one. Setting up a simple inspection routine can save you a lot of headaches down the road. Regular inspections can help identify cracks early, allowing for timely repairs before they worsen. Plan to walk around and check your slabs twice a year, maybe in the spring and fall. Look for any new cracks and take photos of existing ones to monitor their growth. This proactive approach is a core part of any good concrete maintenance plan and ensures small issues don’t turn into major repairs.
Frequently Asked Questions
How do I know if a crack is just cosmetic or a serious structural issue? The best clues are the crack's size and behavior. Generally, a crack wider than half an inch, or one where the concrete is uneven and one side is higher than the other, points to a deeper problem. Also, pay attention to whether the crack is actively growing. If you notice it getting longer or wider over a few months, or if you see other signs like sticking doors inside your house, it’s a good idea to consult a structural engineer.
What's the biggest mistake people make when trying to fix concrete cracks? Hands down, the most common mistake is skipping the prep work. It’s easy to think you can just squeeze some filler into the crack and call it a day, but if you don't thoroughly clean out all the dust and debris, the new material won't bond correctly. Taking the time to clean, dry, and properly shape the crack is what ensures your repair will actually last.
Can I repair a concrete crack in any weather? Temperature and moisture play a big role in how well a repair sets. Most fillers and sealants need a completely dry surface to cure properly, so you should avoid making repairs right after it rains or if the concrete is damp. Extreme cold or heat can also affect the curing process. It's always best to check the product label for the ideal application temperature range and plan your project for a clear, moderate day.
Why is a backer rod so important for wider cracks? Using a backer rod in a wide crack does two very important things. First, it fills most of the space, which means you use a lot less of the more expensive sealant or epoxy. Second, it creates a solid base for the filler and ensures it only sticks to the two sides of the crack, not the bottom. This allows the sealant to stretch and move with the concrete, creating a much more flexible and durable repair.
How can I make my repair blend in with the old concrete? Getting a seamless look is all about the finishing touches. After you apply the filler, use a putty knife to smooth the surface, feathering the edges into the existing slab. Once the patch is fully cured, you can use a grinder to sand it down so it's perfectly level. For an even better match, some concrete patching compounds are designed to mimic the color and texture of aged concrete.
Recommended Reading

What Are Pokémon Half Art Cards? A Collector's Guide
Learn what makes Pokémon half art cards unique, how to spot them, and why collectors love these standout cards. Get tips for buying and protecting yours.

Haunter Full Art Card: Grading, Value & Rarity
Get the facts on the Haunter full art card—grading tips, current value, rarity, and how to spot authentic cards for your Pokémon collection.

Can You Use Promo Cards in Pokémon TCG? A Guide
Wondering can you use promo cards in Pokémon TCG? Learn the rules, legality, and tips for adding promo cards to your deck for tournaments and casual play.